Home
This is a template directory to help stand up new documentation sites. To setup your own site please follow these instructions.
Setup things on your local laptop⚓︎
- On your local laptop, switch to a directory where you want this repo to live
- Clone the BT-MKDocs repo (
git clone git@ssh.dev.azure.com:v3/Commvault/BATS/BT-MKDocs) - Change Directory into the new
BT-MKDocsfolder - Copy the
Templatefolder into the new name you want to use for your site (egACME). Make sure you write this down - Open up the IDE of your choice and open up the new folder (
ACME) - Modify the file
mkdocs.yml. Change the first 5 lines at the top so they match your needs. - Push your new changes back to the git repo (
git push -u origin)
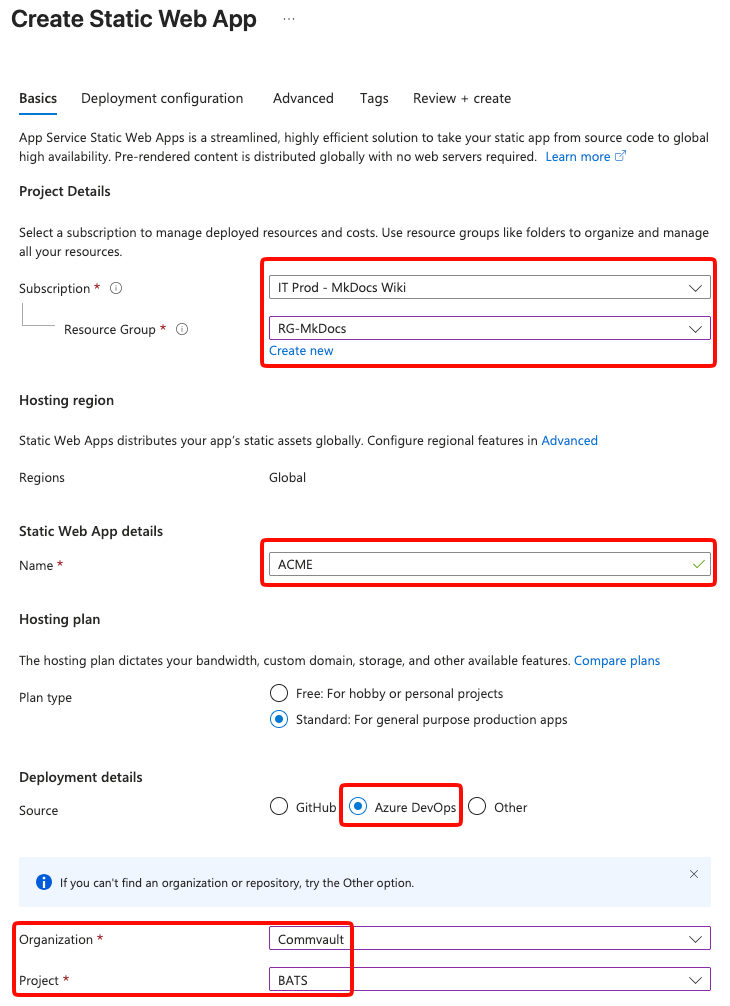
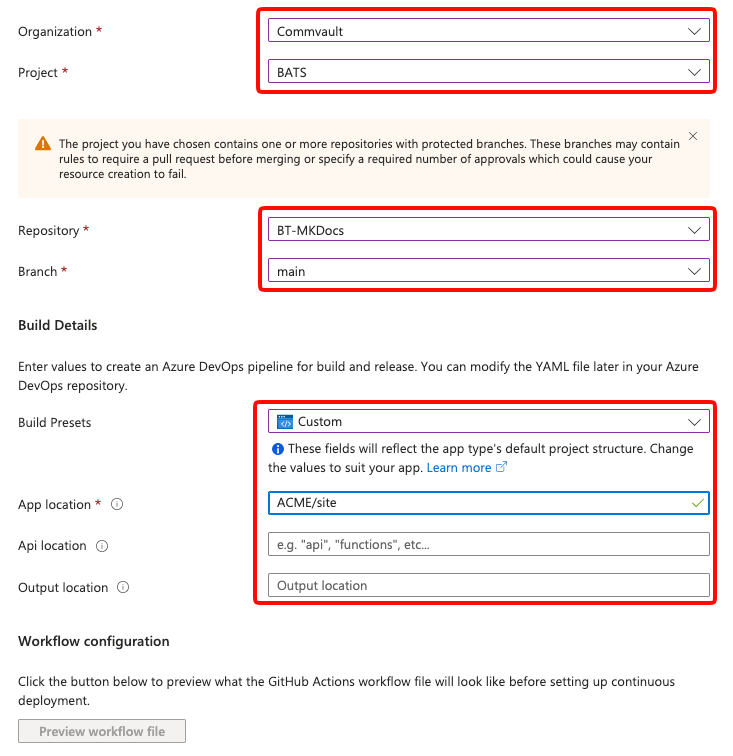
Create the new Static Web App⚓︎
Your documentation will be hosted on a Static Web App in Azure.
- Visit the Static Web Apps page
- Click on the
Createbutton in the top left - Set things up as you see in the screenshots below. The Site Name should be the same as what you picked out above (
ACMEin our example)
Setup the Pipeline⚓︎
Once the new SWA is created, a new pipeline file will be created in the root of our repo. You need to find this and modify things.
- From your laptop, while still in the same folder as before, do a fresh pull (
git pull) - A new YML file will be added at the root level with a long and random name (eg
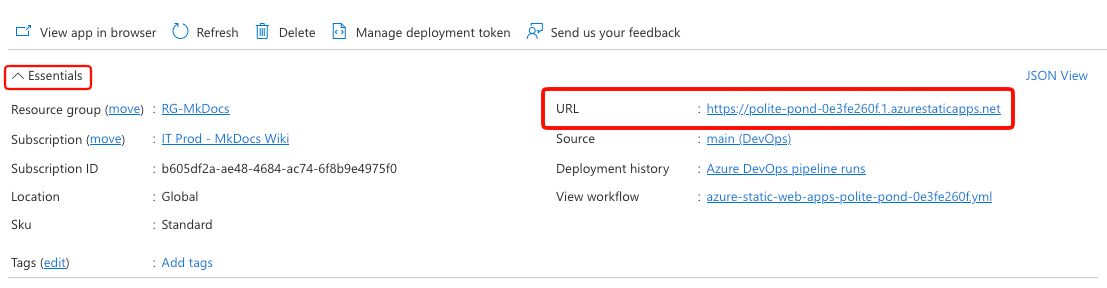
azure-static-web-apps-purple-bush-060ebe50f.yml) - The name at the end of this file (eg
purple-bush-060ebe50f) will correspond to the new name of your SWA. If you aren't sure what that is, go back to the Static Web Apps page and click on the new SWA you've created. You will see the name in the Essentials -> URL
- Open up this new YML file in your IDE, we first need to extract some information
- Look for the following lines and copy them into another text file/notepad
- Under the
variablessection copy out the line starting withgroup:. It will contain the name of your new SWA, make sure you hold on to that value. - Near the bottom you'll see task -> inputs -> azure_static_web_api_token. Copy out that value as well and save it in your notepad.
- Copy over the entire contents of pipeline-template.yml and overwrite what you have in your current pipeline YML. In other words, your new pipeline should look exactly like the
template-pipeline.ymlfile already in our repo. - Go find the values for variables -> group and task -> inputs -> azure_static_web_app_api_token and replace them with their appropriate values you captured in your notepad.
- Do a search and replace now. Replace all occurences of
Templatewith your site name (egACME). - Save your file and upload things back to to the git repo
- Go to the Pipelines in Azure and find your file (it helps to scroll down and then search for part of your random name (eg
purple-bush)). - Once you find it, go over to the far right and click on the 3 dots, select
Rename/move - Give your pipeline the name of your site (eg
ACME) - Set the location to
MkDocs - Click on Save
Run the new pipeline⚓︎
- Go back and find your pipeline with the new name and click on it.
- In the top right corner should be a blue button called
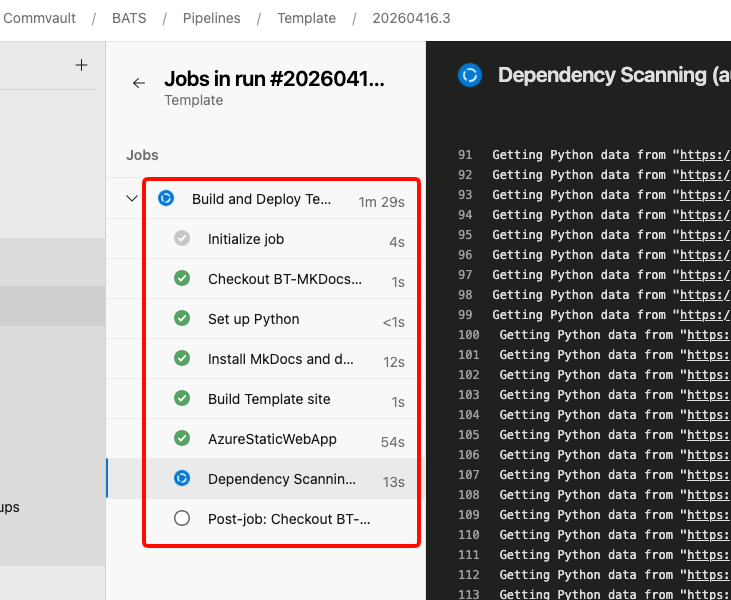
Run pipeline. Click on this button - This will load a new page where you can see the build process. In the bottom is a square you can click on to watch things run.
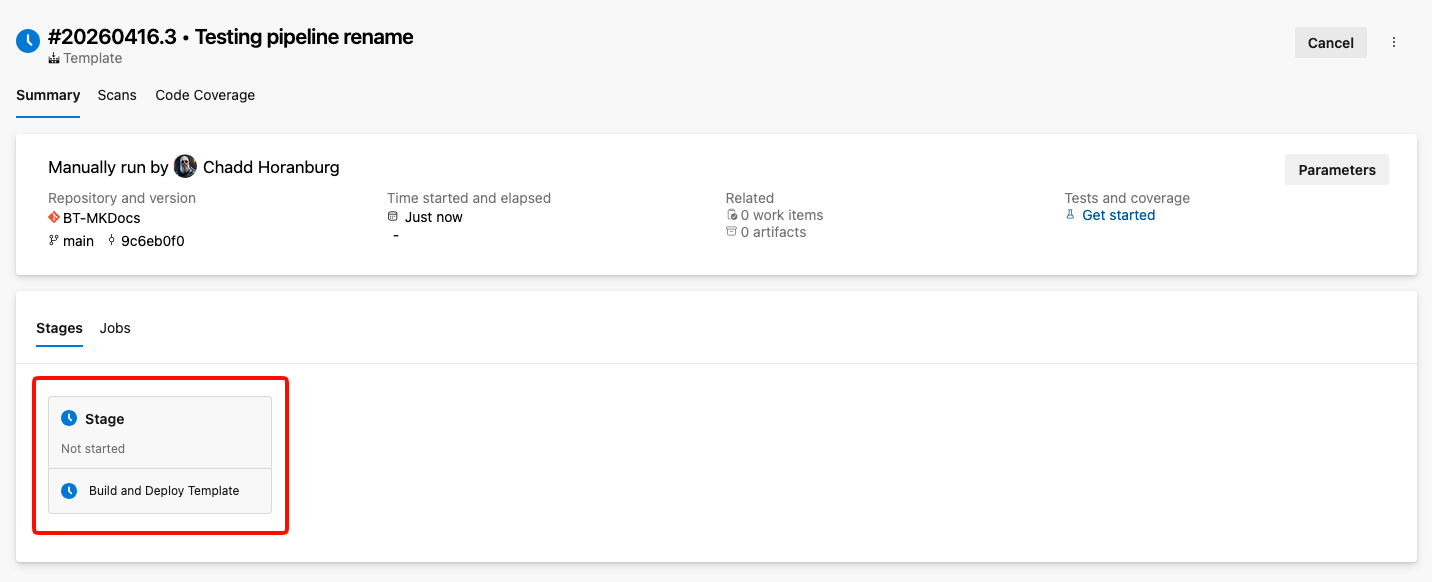
You should then see all of the stages and be able to watch as they execute. If there are any errors, they will show up here.
If everything is successful, it will look like this
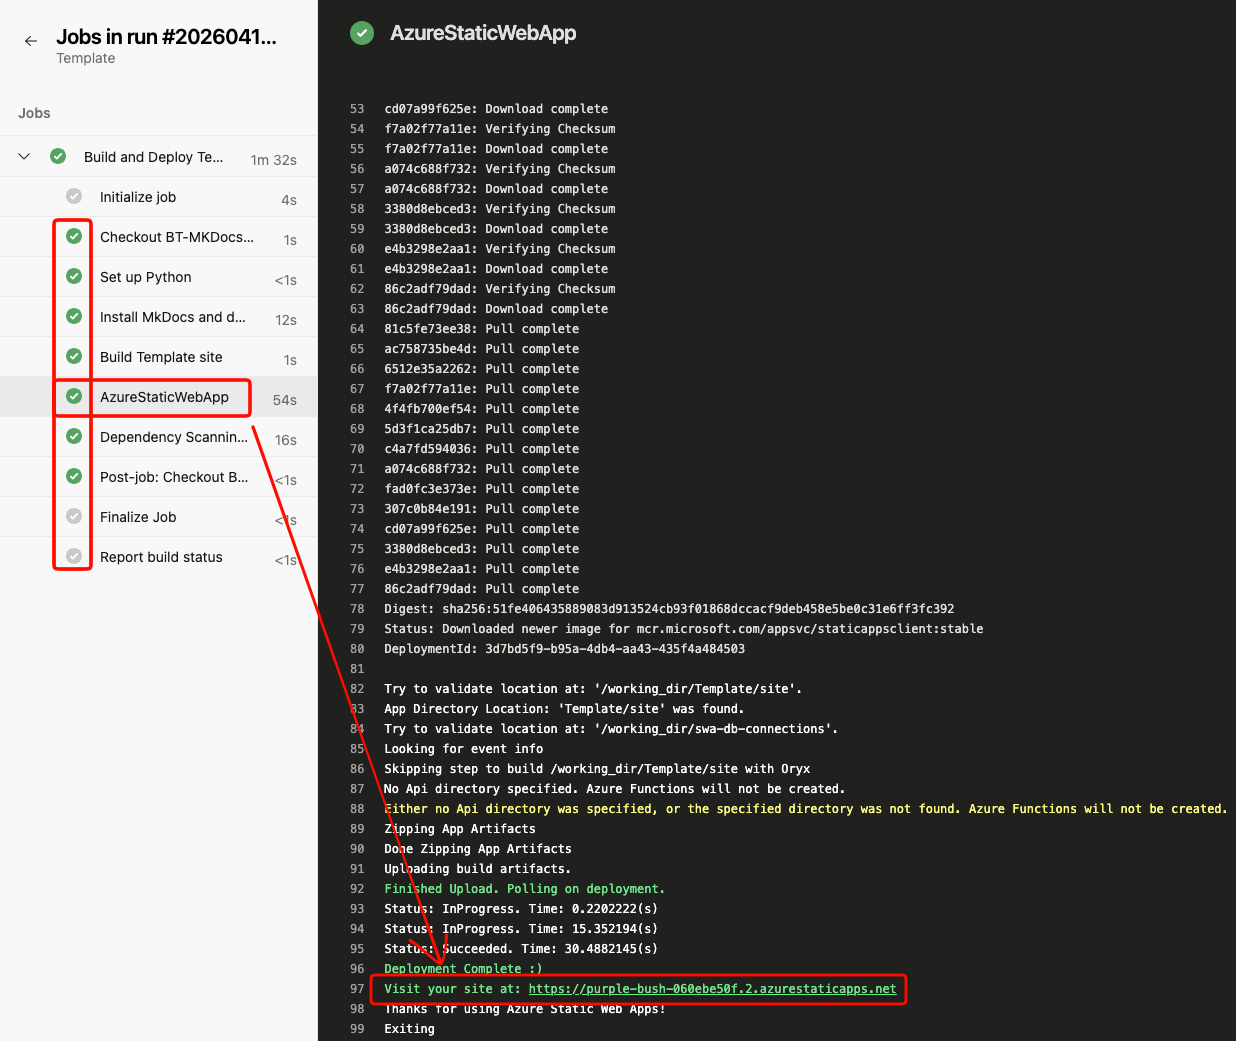
Click on the link next to Visit your site at: and verify it opens, you should see a Hello World page.
Setup a custom DNS entry⚓︎
We don't want our sight to live at something like https://purple-bush-060ebe50f.2.azurestaticapps.net/ so we'll need a custom domain. The current format will be <site-name>-docs, so for our example, it would be acme-docs.
Open a ticket with the helpdesk⚓︎
- Copy the current url of your site (eg
https://purple-bush-060ebe50f.2.azurestaticapps.net/) - Create a ticket with the helpdesk and ask for a new CNAME in our DNS. Give them the values of your site (
acme-docs.commvault.com) and the URL it should be pointed at (`https://purple-bush-060ebe50f.2.azurestaticapps.net/). Wait until they have confirmed the new site is created before you continue.
Update your SWA⚓︎
- Go back to the Static Web Apps page and open up the SWA for your site.
- Under the Settings click on
Custom domains - Click on the
Addbutton in the top and selectCustom Domain on other DNS - Put in your full domain name (eg
acme-docs.commvault.com) - Click on the Next button, and then Validate and Add
- This process will take several minutes (5 to 10 minutes) to complete.
- Once done, verify you can reach your site at the new URL
Setup Authentication⚓︎
By defualt, your new site is available to anyone (public). We assume the documentation you are creating should be restricted to just Commvault employees.
- Go back to your IDE and under your site, find the file
docs/staticwebapp.config.json.hide, rename it and remove the.hideextension. - Go back to your pipeline YML file and find a step that is commented out, somewhere around line 42
  #This step forces the check for the authentication file.
  - script: |
      if [ ! -f Template/site/staticwebapp.config.json.hide ]; then
        echo "ERROR: staticwebapp.config.json is missing from the build output!"
        exit 1
      fi
      echo "staticwebapp.config.json found, proceeding with deployment."
    displayName: 'Verify staticwebapp.config.json exists'
Find the line where it looks for our staticwebapp.config.json.hide file (f [ ! -f Template/site/staticwebapp.config.json.hide ]) and remove the same .hide extension from here.
Commit your changes and upload them to the git repo again. Go monitor the pipeline and wait for it to finish. Once it has finished, you should not be able to access your site. This is expected behavior.
Update the Resource⚓︎
This part will have to be handled via Helpdesk as well. There is a resource in Azure called BT MkDocs Wiki Authentication and your new custom domain will have to be added to this, along with the /.auth/loginc/aad/callback at the end. In our example, the full Redirect URI would be https://acme-docs.commvault.com/.auth/login/aad/callback.
Once this has been done, you should be able to now visit your site again and get prompted to login with your Commvault credentials.
Congratulate yourself and build your site⚓︎
You have now successfully deployed a new documentation site and pipeline. Now you can go back to your IDE and start building out the content you want. When you are done, upload it to the git repo and your pipeline should automatically kick off. Your changes should be reflected in the new site within 3 to 5 minutes. If you do not see your changes after 5 minutes, go back to your pipeline and see if something went wrong.